
Table of Contents
- Why Cleaning Your Outdoor AC Unit Matters
- Signs of Dirty AC Coils and When Cleaning Is Needed
- What You’ll Need: Tools and Materials
- Step-by-Step Guide to Clean Your Outdoor AC Unit
- How to Reduce High Energy Bills Through Regular Maintenance
- Chemical vs. Non-Chemical Cleaning Methods
- Common Mistakes to Avoid
- When to Call a Professional
- Frequently Asked Questions
Last Updated: September 17, 2026
Why Cleaning Your Outdoor AC Unit Matters
A dirty outdoor AC unit forces your system to work harder, wasting energy and driving up cooling bills, which is why learning to clean outdoor AC unit maintenance is essential. Regular cleaning keeps your air conditioner running efficiently and extends its lifespan.
Your outdoor unit’s condenser coils and aluminum fins release heat from your home. When dirt and debris block them, airflow is restricted, forcing your system to run longer and use more power.
Regular maintenance prevents expensive repairs and keeps energy consumption low. Regular cleaning keeps your air conditioner running efficiently and extends its lifespan. We recommend cleaning your outdoor AC unit at least once a year, spring is ideal, before cooling season starts.
Clean your outdoor unit early in the season. This gives your system time to run efficiently all summer long.
Signs of Dirty AC Coils and When Cleaning Is Needed
Your cooling performance drops. The system struggles to keep your home cool, and some rooms may stay warmer than others.
Your energy bills spike. A dirty unit makes your system work overtime. This shows up on your electric bill.
You see visible dirt and debris. If you see leaves, grass, or grime on the condenser coils and aluminum fins, it’s time to clean.
The fan sounds loud or strange. Blockages force the fan to work harder, creating unusual noise.
Your thermostat shows the system running constantly. If your AC runs more than usual, clogged condenser coils prevent proper heat release.
Check your outdoor unit every three months during cooling season. This helps you catch problems early.
Ignoring a dirty AC unit can lead to compressor failure. This is one of the most expensive repairs in an HVAC system. Prevention costs far less than replacement.
What You’ll Need: Tools and Materials
Safety equipment:
- Work gloves
- Safety glasses
- Closed-toe shoes
Cleaning tools:
- Garden hose with adjustable nozzle
- Soft-bristle brush or fin comb
- Fin straightening tool (optional but helpful)
- Spray bottle
- Towels or rags
Cleaning supplies:
- Coil cleaner (optional; see section on chemical vs. non-chemical methods)
- Mild dish soap
- Water
Most items are household basics. A fin comb is inexpensive and straightens bent fins without damage.
You don’t need expensive equipment to clean your outdoor AC unit. Basic household items and a garden hose do the job well for most homeowners.
Step-by-Step Guide to Clean Your Outdoor AC Unit
Follow these steps to properly clean outdoor AC unit and restore its efficiency. The process takes one to two hours.
Step 1: Turn Off Power at the Breaker Panel
Always disconnect power before working on your AC unit. Go to your electrical breaker panel, find the air conditioner breaker, and switch it OFF. Some units have a separate electrical disconnect switch near the outdoor unit, turn that off too. Wait five minutes to let residual power drain. Never skip this step.
Step 2: Remove Debris and Clear the Area
Remove leaves, sticks, and debris by hand and sweep. Clear a two-foot radius around the unit to improve airflow and give yourself room to work. Trim back bushes and vines that block airflow or trap moisture.
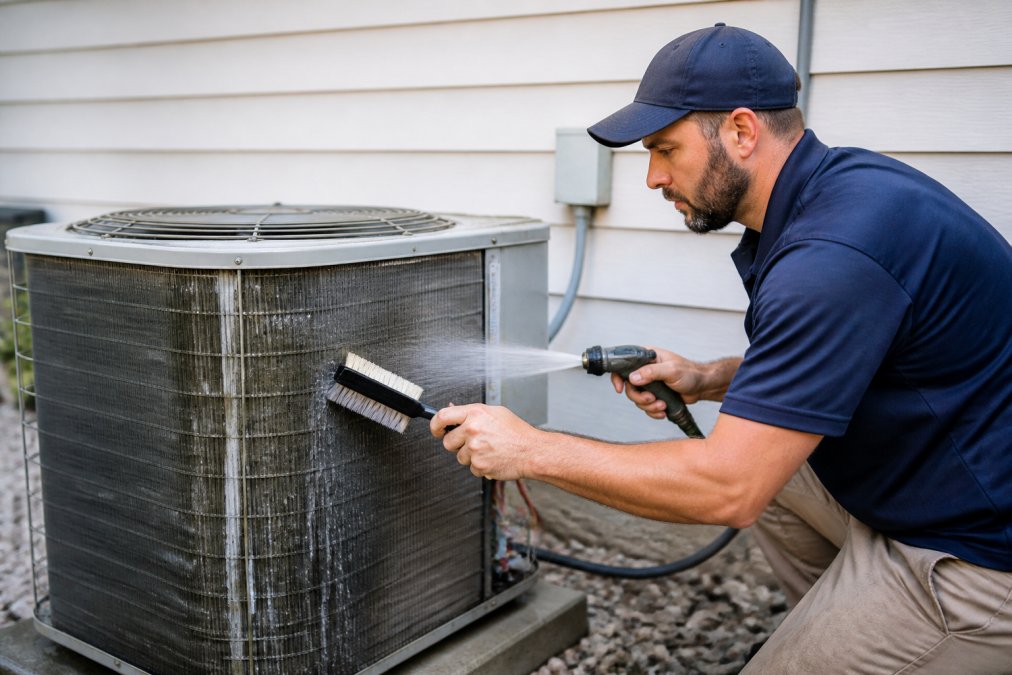
Step 3: Rinse the Condenser Coils and Aluminum Fins
Set your garden hose to low pressure, high pressure bends aluminum fins. Start at the top and work down, rinsing the condenser coils and aluminum fins thoroughly for two to three minutes. Spray from inside out if accessible to push dirt away. Never use a pressure washer.
Step 4: Apply Coil Cleaner
This step is optional, water alone is enough for most homeowners. If using coil cleaner, follow product instructions, let it sit as specified, then rinse thoroughly with low-pressure water. Don’t let it pool inside the unit.
Step 5: Straighten Bent Fins and Rinse Again
Inspect the aluminum fins for bends that reduce airflow. Use a fin comb to straighten them gently in one direction only. Rinse again with low-pressure water to remove debris and residue. Let the unit dry completely (30 minutes to one hour).
How to Reduce High Energy Bills Through Regular Maintenance
Cleaning your outdoor AC unit reduces high energy bills by keeping your system efficient. Schedule cleaning twice yearly (spring and fall), change air filters monthly, have annual professional inspections, keep the area clear, set your thermostat a few degrees higher in summer (saving ~3% per degree), and seal air leaks around windows and doors. Regular maintenance prevents efficiency loss and reduces operating costs.
Chemical vs. Non-Chemical Cleaning Methods
You have two options for cleaning your outdoor AC unit. Both work. The choice depends on how dirty your unit is, your comfort level with chemicals, and environmental considerations.
Non-chemical cleaning uses water and a soft brush, the safest, most common method for light to moderate dirt. It requires only basic tools, poses no chemical damage risk, and is free and environmentally friendly. Cleaning twice yearly with water alone prevents heavy buildup.
Chemical cleaning uses commercial coil cleaners (typically alkaline, pH 10-13) to break down grease, mold, and mineral deposits faster than water. It works better for heavy buildup, dusty/humid climates, or systems not cleaned in years. Always rinse thoroughly despite “no-rinse” labels.
How to choose: Start with non-chemical cleaning. If dirt remains after 5-10 minutes or you see oily residue, use chemical cleaning. Never use harsh solvents or pressure-washer additives, they corrode aluminum fins and copper tubing.
Chemical application and safety: Follow product instructions exactly. Wear nitrile gloves and safety glasses with good ventilation. Spray evenly on condenser coils, let sit (usually 5-15 minutes), then rinse thoroughly with low-pressure water from top to bottom. Allow complete drainage before restarting.
Environmental and corrosion concerns: Direct coil cleaner runoff away from gardens and storm drains; check local hazardous waste regulations. Chemical residue left on coils causes white or blue corrosion spots within weeks, reducing heat transfer. Always rinse until water runs clear.
Post-cleaning inspection: After chemical cleaning, inspect coils 24 hours later. If you see white, blue, or green discoloration, rinse again with distilled water.
Non-chemical cleaning is safer, cheaper, and works for routine maintenance. Use chemicals only when water alone doesn’t remove stubborn buildup. Always rinse thoroughly and dispose of runoff responsibly.
Common Mistakes to Avoid
These mistakes can damage your unit or reduce cleaning effectiveness.
Using high-pressure water. Pressure washers bend aluminum fins, reducing airflow and efficiency. Always use low pressure, holding the nozzle at least six inches away.
Forgetting to turn off power. Always switch off the breaker before starting, working on live electrical systems is dangerous.
Cleaning only the outside. Rinse the interior if safely accessible, but never force access or disassemble parts.
Ignoring bent fins. Straighten them with a fin comb, bent fins reduce heat exchange and cooling efficiency.
Skipping the annual professional inspection. Technicians have specialized tools and training to catch internal problems early.
Using harsh chemicals or solvents. These corrode coils and damage the unit. Use only HVAC-specific products.
Cleaning in the wrong season. Spring is best for summer efficiency; fall cleaning prepares for heating season.
When to Call a Professional
Troubleshooting after cleaning:
-
Unit runs but doesn’t cool. Check that the breaker is ON, thermostat is set to COOL, and temperature is below room temperature. If indoor air is warm, the compressor may not be running, call a technician.
-
Unit cycles on and off frequently. Repeat cleaning, paying attention to interior coils and bent fins. If cycling continues, the problem is internal (refrigerant, expansion valve, or compressor), call a technician.
-
Energy bills haven’t improved. Other system problems may exist. A technician can check refrigerant charge, indoor coil airflow, and ductwork leaks (often 30-50% of inefficiency).
-
Unit is noisy after cleaning. Rattling or grinding may indicate a loose fan blade, internal debris, or failing compressor. Call a technician immediately.
When professional service is necessary:
If you’re not comfortable working on electrical systems. Hire a pro, mishandling electrical connections creates fire hazards.
If your unit is still dirty after cleaning. The problem may be internal (coils inside the cabinet or debris in refrigerant lines). Technicians have specialized tools to access and clean internal components safely.
If you notice refrigerant leaks. You’ll see oily residue or hear hissing. Only EPA-certified technicians can handle refrigerant, attempting this yourself is illegal and dangerous.
If the condenser fan doesn’t spin. The motor or capacitor may have failed, these require professional replacement.
If you see ice buildup on the indoor coil or refrigerant lines. This indicates low refrigerant or restricted airflow.
Frequently Asked Questions
What are the signs of dirty AC coils?
Dirty AC coils show visible dirt, dust, or algae buildup on the condenser fins and coils. Your system may run longer to reach the set temperature, airflow efficiency decreases, and you might notice higher energy bills. If the outdoor unit feels hot to the touch or the fan runs constantly, these are signs of heat exchange problems caused by restricted airflow from debris and grime accumulation.
What is the best coil cleaner for AC units?
The best coil cleaner depends on your cleaning method. For non-chemical cleaning, soapy water and a soft brush work well for light buildup. For heavy grime, commercial coil cleaners designed for HVAC systems are effective, but always follow manufacturer instructions. Avoid acidic cleaners on aluminum fins. If you’re unsure which product suits your system, contact a professional to ensure you use the right cleaner for your unit’s material and condition.
How often should you clean your outdoor AC unit?
Most HVAC systems benefit from annual cleaning before the cooling season begins, typically in spring. If you live in a dusty area, have trees nearby, or run your system heavily, clean it every 6 months. Regular preventative maintenance helps maintain cooling capacity and system longevity. A professional annual inspection can identify when cleaning is necessary and catch other maintenance needs early.
Can I use a pressure washer to clean my AC unit?
A pressure washer can damage aluminum fins and refrigerant lines if used incorrectly. Use only low-pressure rinse settings (below 500 PSI) and keep the nozzle at least 2 feet away from the unit. Never spray directly at fins or the compressor. A garden hose on a gentle setting is safer for most homeowners. For stubborn debris, a soft brush combined with soapy water is the preferred method to avoid costly repairs.