
Table of Contents
- What Actually Happens During a Professional Home Energy Audit
- How Long Does a Home Energy Audit Take?
- The Financial Benefits: Lower Utility Bills and Available Incentives
- DIY vs Professional Energy Audit: What You Miss on Your Own
- Health, Safety, and Indoor Air Quality Improvements
- Home Energy Efficiency Improvements: Your Post-Audit Implementation Plan
- Conclusion
- Frequently Asked Questions
Last Updated: October 1, 2026
What Actually Happens During a Professional Home Energy Audit
Professional home energy audits are a room-by-room evaluation of how your house uses, loses, and wastes energy, performed with diagnostic equipment rather than guesswork. For homeowners in Maryland, DC, and Northern Virginia, the benefits of professional home energy audits start with one thing a visual walkthrough can never deliver: measured data about where your conditioned air actually goes.
- Utility bill review. The auditor reads 12 months of usage to establish your baseline and spot seasonal spikes.
- Visual inspection. Attic, crawlspace, rim joists, duct runs, and the building envelope get checked for gaps, compressed insulation, and moisture.
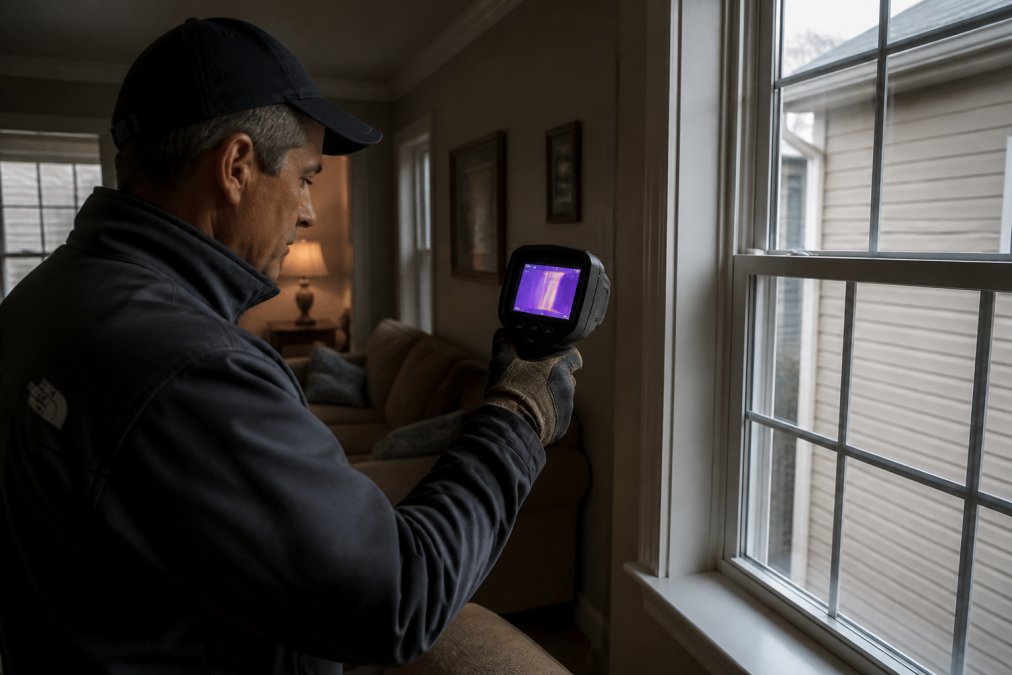
- Diagnostic testing. Blower door and thermal imaging quantify the leakage a walkthrough can only suspect.
- Written report. You receive prioritized findings with recommended fixes ranked by impact.
The Blower Door Test and Thermal Imaging
The blower door test measures how much air leaks through your building envelope. A calibrated fan mounts in an exterior doorway, depressurizes the house, and reports your air changes per hour. Thermal imaging then shows you where that air is escaping, because temperature differences reveal gaps behind drywall that are invisible to the eye.
How Long Does a Home Energy Audit Take?
A typical home energy audit takes two to four hours for an average single-family house, with larger or older homes running longer. The blower door test itself takes roughly 30 to 45 minutes once the house is prepped, and thermal imaging adds another 30 to 60 minutes depending on square footage.
The Financial Benefits: Lower Utility Bills and Available Incentives
Energy waste shows up on every utility bill, and the audit tells you which specific defects are causing it. Most homeowners find the biggest offenders fall into a short list:
- Unsealed attic penetrations around wiring and plumbing
- Missing or compressed insulation at the rim joist
- Leaky duct joints in unconditioned space
- Poor HVAC performance from undersized returns or dirty coils
The Incentive Stack You Can Actually Claim
Federal and utility incentives change often, so we won’t quote figures here. What we will do is map the programs so you know what to look for:
- Federal tax credits. The ENERGY STAR federal tax credit guidance lists qualifying improvements, insulation and air sealing materials, certain windows and doors, heat pumps, and high-efficiency HVAC, along with the credit percentages and annual caps in effect for the tax year.
- Utility rebates. Most investor-owned utilities and many co-ops run residential rebate programs for air sealing, duct sealing, insulation, and equipment upgrades. Rebate amounts and eligible measures vary by territory, so pull your utility’s current residential rebate sheet rather than relying on a number you saw last year.
- State and local programs. Some states layer additional incentives on top of federal credits, and a few offer low-interest financing for efficiency work. Your auditor should be able to point you to the programs that apply to your address.
- Weatherization assistance. Income-qualified households may be eligible for federally funded weatherization services delivered through state and local agencies, which can cover air sealing, insulation, and related repairs at no cost.
Calculating Your Return on Investment
ROI = (annual energy savings + available incentives) ÷ installed cost
Work through it in four steps:
- Estimate annual savings for each measure using your auditor’s projected figures and your actual utility rates. If your auditor gives you a range, run the math at the low end, that’s your conservative case.
- Add any rebate or tax credit you qualify for to the numerator, since incentives effectively reduce what you’re paying for the improvement.
- Divide by the quoted installed cost.
- Rank the list by result, then by payback period in years. Payback is simply installed cost (net of incentives) divided by annual savings.
A measure with a 30% ROI and a 3-year payback beats a measure with a 40% ROI and a 12-year payback if you plan to move before the second one pays off. Match the math to your timeline, not just the headline number.
Why the Order of Operations Changes the Math
ROI isn’t calculated in a vacuum. If you insulate before you air seal, the insulation underperforms and your savings estimate is wrong. If you replace the furnace before you seal the ducts, you’ve paid for capacity that leaks into the attic. The audit report sequences the work for a reason: each step changes the baseline the next step is measured against.
DIY vs Professional Energy Audit: What You Miss on Your Own
A DIY walkthrough can find obvious drafts and dirty filters, and it costs nothing. What it cannot do is measure. The difference isn’t effort, it’s instrumentation. Here’s what each approach actually catches.
| What you’re looking for | DIY walkthrough | Professional audit |
|---|---|---|
| Obvious drafts around windows and doors | Yes, hand, incense, or thermal leak detector | Yes, plus quantified leakage |
| Air changes per hour (how leaky the envelope is) | No | Yes, blower door test |
| Insulation gaps behind finished walls | No | Yes, thermal imaging |
| Thermal bridging at framing | Rarely | Yes, thermal imaging |
| Duct leakage in unconditioned space | No | Yes, pressure pan or duct blaster testing |
| Combustion appliance backdrafting | No | Yes, depressurization testing |
| Moisture and mold risk in crawlspace | Visual only | Yes, moisture readings plus airflow analysis |
| Prioritized, costed repair list | No | Yes, written report with ranked measures |
What a DIY Pass Is Actually Good For
This isn’t an argument against doing anything yourself. A DIY walkthrough is genuinely useful for:
- Filter maintenance. Checking and replacing HVAC filters on schedule is the cheapest efficiency habit there is.
- Obvious air sealing. Weatherstripping doors, caulking visible gaps around window frames, and sealing around pipes where they enter the house are reasonable DIY projects.
- Building a punch list. Walk the house room by room, note every draft, cold spot, and moisture stain, and bring that list to the auditor. It makes the professional visit more productive.
The Documentation Advantage
A professional audit also produces documentation. Contractors quote from it, incentive programs require it, and you get a baseline to compare against after the work is done. If you plan to claim a federal tax credit or a utility rebate, the paperwork matters: programs typically want to see the recommended measures and, in some cases, pre- and post-work verification. A DIY walkthrough leaves you with a list and no proof.
If you’re weighing DIY versus professional, ask yourself one question: do you need to know whether your house leaks, or how much and where? The first is a walkthrough. The second is an audit.
Health, Safety, and Indoor Air Quality Improvements
Air sealing and ventilation work together, and getting the balance wrong creates problems. Tighten a house without addressing fresh air intake, and you trap moisture, cooking byproducts, and volatile organic compounds indoors. That’s why a good audit report includes ventilation recommendations alongside leakage findings.
Three safety items deserve attention in any audit:
- Combustion appliance backdrafting. Depressurization testing reveals whether your furnace or water heater can vent properly.
- Moisture control. Unsealed crawlspaces drive humidity into living space, feeding mold and degrading insulation.
- Carbon monoxide risk. Older homes with natural draft appliances need verification that flue gases exit, not linger.
Home Energy Efficiency Improvements: Your Post-Audit Implementation Plan
The audit is the beginning, not the deliverable. What separates homeowners who see lower bills from those who don’t is sequencing the work correctly.
| Priority | Improvement | Typical Timeline | Why It Comes Here |
|---|---|---|---|
| 1 | Air sealing (attic, rim joist, penetrations) | 1 day | Cheapest per unit of savings; prerequisite for insulation |
| 2 | Insulation upgrades | 1-2 days | Only performs once air leakage stops |
| 3 | Duct sealing and repair | 1-2 days | Recovers conditioned air before equipment sizing |
| 4 | HVAC tune-up or replacement | 1 day | Size equipment to the improved envelope |
| 5 | Smart thermostat and monitoring | Same day | Tracks whether the fixes worked |
Photograph your audit report and store it with your closing documents. When you sell, documented energy improvements are a concrete selling point, and future contractors can see exactly what was already addressed.
Conclusion
The hard part isn’t scheduling the audit, it’s acting on the report in the right order and resisting the temptation to replace equipment before the envelope is fixed. Anthony & Son Indoor Air Quality, LLC performs energy assessments, air sealing, duct repair, and HVAC upgrades as one coordinated scope, so the findings and the fixes come from the same certified technicians.
Frequently Asked Questions
How much money can a home energy audit save me annually?
Savings vary based on your home’s current efficiency and the upgrades you make. The audit identifies where energy is wasted through air leakage, poor insulation, and outdated HVAC performance. Many homeowners see reductions in utility bills after implementing recommended improvements like sealing the building envelope and upgrading to a smart thermostat. The audit itself gives you a prioritized list of fixes with the highest impact, so you can start with the changes that deliver the best return.
Does a home energy audit help with HVAC system longevity?
Yes. An audit evaluates HVAC performance and identifies issues like duct leakage, improper sizing, or airflow restrictions that force your system to work harder than necessary. When those problems are corrected, the equipment runs under less strain, which can extend its service life. The audit report also helps you plan maintenance and upgrades so you are not replacing a system prematurely because of fixable inefficiencies.
Can an energy audit identify indoor air quality issues?
A professional audit examines ventilation, moisture control, and air leakage, all of which affect indoor air quality. The blower door test and thermal imaging can reveal paths where outdoor pollutants enter and where moisture accumulates. If the assessment finds problems, the auditor recommends fixes such as improved ventilation or sealing that reduce drafts and help maintain healthier air for your family.
How do I prepare my home for an energy assessment?
Clear access to your attic, basement, and crawl spaces so the technician can inspect insulation levels and the building envelope. Make sure utility bills are available for the past 12 months to help analyze energy usage patterns. Close windows and doors before the blower door test. If you have pets, secure them during the visit. These steps help the auditor complete a thorough evaluation and give you more accurate recommendations.
If your utility bills keep climbing and one room never feels right, the answer is in the measurements, not another guess. Contact Anthony & Son Indoor Air Quality, LLC today to schedule a professional home energy audit and get a prioritized plan for lower bills, better airflow, and cleaner indoor air.