
Table of Contents
- What You’ll Need Before You Start
- How to Find Air Leaks in Your Home: DIY Tests That Work
- Best Tools for Detecting Air Leaks
- Where Air Leaks Hide: Common Locations to Check
- Signs of Leaky Air Ducts and HVAC Air Loss
- How to Seal Air Leaks in House: A Step-by-Step Approach
- Frequently Asked Questions
Last Updated: September 30, 2026
What You’ll Need Before You Start
Air leaks are gaps, cracks, and openings in your building envelope that let outside air in and conditioned air out. The U.S. Department of Energy notes that sealing them is one of the fastest ways to cut energy bills and improve comfort.
Before you grab a caulk gun, gather a few basics. This guide walks you through each step.
Your starter kit:
- A stick of incense or a smoke pencil
- A bright flashlight
- A notepad or phone for photos
- Painter’s tape for marking spots
How to Find Air Leaks in Your Home: DIY Tests That Work
The best way to find air leaks is to test while your home is under pressure. Close all windows and doors. Turn on your bathroom and kitchen exhaust fans. This pulls outside air through every gap.
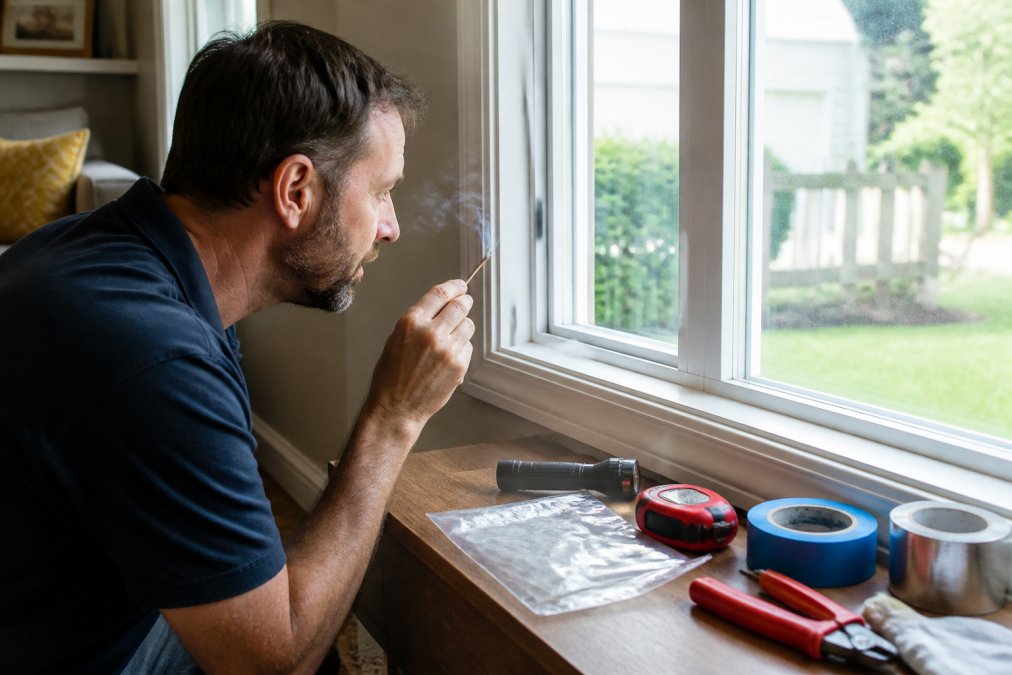
Now walk the perimeter of each room. Check outlets, trim, and window frames. Two simple tests do most of the work.
The Incense and Smoke Pencil Test
A smoke pencil releases a thin stream of smoke. Hold it near a suspected gap: if the smoke wavers or gets pulled toward the gap, you found a leak.
The Flashlight and Hand Test
On a sunny day, turn off your lights and look for daylight around doors and windows. Bright lines mean gaps.
Best Tools for Detecting Air Leaks
The best tools for detecting air leaks range from a few dollars to a few hundred. Start simple and add tools only when a problem is hard to pin down.
| Tool | Best For | Skill Level | Cost Range |
|---|---|---|---|
| Incense or smoke pencil | Quick spot checks at frames, trim, outlets | Beginner | Under $15 |
| Flashlight | Daylight gaps and nighttime frame checks | Beginner | Already own |
| Infrared thermometer (spot) | Confirming a single cold surface | Beginner | $25-$60 |
| Smartphone thermal attachment | Wall, ceiling, and attic-hatch scans | Intermediate | $200-$500 |
| Standalone thermal camera | Whole-home sweeps, hard-to-reach cavities | Intermediate | $300-$1,500+ |
| Blower door test | Whole-home air leakage rate (ACH50) | Pro only | Pro service call |
Thermal Imaging Cameras
A thermal imaging camera shows temperature differences on a screen. Cold spots in winter and warm spots in summer often point to air infiltration, revealing leaks behind drywall, around attic hatches, and near floor joists. Visualizing these thermal signatures effectively requires a methodical approach to using thermal imaging, which helps clarify the specific steps for identifying hidden structural breaches.
Rent or Buy? A Practical Decision
High-end thermal cameras are expensive, and most homeowners use one for a single weekend. Before you buy, weigh the math:
- Rent for a one-time sweep. Many hardware stores and tool-rental counters rent thermal cameras by the day or the weekend. For a single pre-winter inspection, a rental costs a fraction of a purchase.
- Buy a smartphone attachment for repeat use. Clip-on thermal modules turn a phone into a basic thermal camera. They are less sensitive than a standalone unit, but they are enough for finding obvious wall, ceiling, and door leaks, and they fit in a drawer.
- Buy a standalone camera only if you will test often. Landlords, flippers, and homeowners in older housing stock who test every season get their money back. Everyone else usually does not.
Energy Saver, do-it-yourself home energy assessments
Blower Door Tests and Pressure Differentials
A blower door test measures your home’s air leakage rate. A technician mounts a powerful fan in an exterior door; it pulls air out, creating a pressure differential, and the tech measures how much air rushes back in, reporting the result as air changes per hour at 50 pascals (ACH50).
Before renting or buying any thermal tool, run the free tests first. A smoke pencil and a windy day will find most of the leaks that cost you money. Save the thermal gear for the leaks that hide.
Where Air Leaks Hide: Common Locations to Check
Air leaks hide in the same places in most homes. The attic and the rim of your house do the most damage. Here is where to look first.
Attics, Knee Walls, and the Top Plate
The attic is the biggest offender. Hot air rises, so gaps up high pull conditioned air straight out of your home.
Check these spots:
- The attic hatch or pull-down stairs
- Knee walls, the short walls where the roof slopes down
- The top plate, where wall framing meets the ceiling
- Wire and pipe penetrations through the ceiling
Windows, Doors, and Interior Wall Joints
Windows and doors are the leaks you can feel. Check the frames, not just the glass. Gaps often form where the frame meets the wall.
Press a dollar bill into a closed door or window. If you can pull it out without resistance, the seal is weak. This is the fastest way to check weatherstripping without any tools.
Signs of Leaky Air Ducts and HVAC Air Loss
Leaky ducts waste energy even after you seal your walls. In many homes, a chunk of the air your system cools or heats never reaches the rooms.
Watch for these signs of leaky air ducts:
- Rooms that never get comfortable
- High energy bills with no clear cause
- Dusty air right after cleaning
- Whistling or whooshing near vents
- Uneven temperatures room to room
Never seal ducts with standard cloth duct tape. It loses its grip within a year and leaves you with the same leak plus sticky residue. Use mastic sealant or UL-listed foil tape instead.
How to Seal Air Leaks in House: A Step-by-Step Approach
Sealing air leaks in your house follows a clear order: do the big, easy wins first, then work toward the small, fussy spots. Before you seal anything, read the safety note at the end of this section, tightening a home without thinking about combustion appliances is the mistake most guides never mention.
Prioritize by Payoff, Not by Ease
Not every leak is worth the same. A drafty window is annoying; an open attic bypass is expensive. Rank your fixes by how much conditioned air they waste:
- Attic bypasses and the top plate. These leak year-round because stack effect pushes conditioned air out the top of the house. Highest payoff, usually the cheapest fix.
- Duct joints in unconditioned space. Leaky ducts in an attic or crawlspace lose air before it ever reaches a room. Sealing them can matter more than sealing every window combined.
- Rim joists and basement/crawlspace penetrations. Cool air sinks and pulls in at the bottom of the house.
- Recessed lights and ceiling penetrations. Older can lights leak air and heat into the attic.
- Window and door frames. Visible and easy to fix, but usually a smaller share of total loss than the top of the house.
- Outlets, switches, and baseboards. Low cost, low individual payoff, but they add up across a whole house.
The Step-by-Step Order
Combustion safety comes before tightness. If your home has a gas furnace, gas water heater, gas range, or a wood-burning fireplace, sealing the envelope too tightly can starve these appliances of combustion air and cause backdrafting, pulling carbon monoxide into living space instead of up the flue. Before you do a major air-sealing project, have a qualified technician check that your combustion appliances have adequate draft and consider a carbon monoxide alarm on every level. Never seal the fresh-air intake or combustion-air vent on any appliance.
Prioritize by payoff, not by ease. Attic and duct leaks usually cost you more than a drafty window. Fix the top of the house first, then work down, and check combustion safety before you make the house airtight.
For homeowners in older homes, some leaks need more than caulk. A certified technician can run a blower door test, find hidden gaps, and seal them right. A certified technician can run a blower door test, find hidden gaps, and seal them right. Anthony & Son Indoor Air Quality, LLC provides airflow improvements and duct sealing for homes and businesses across Maryland, Washington, DC, and Northern Virginia.
Frequently Asked Questions
What are the signs that my air ducts are leaky?
Common signs of leaky air ducts include rooms that never reach the thermostat setting, unusually high energy bills, whistling or rattling sounds from vents, and visible dust streaks around duct joints. You may also notice stuffy air or uneven temperatures between floors. If your HVAC system runs constantly but your home still feels uncomfortable, duct leakage is a likely culprit. A professional can measure your air leakage rate with a blower door test to confirm.
Is there a tool to detect air leaks?
Yes. The simplest tool is a smoke pencil or incense stick, which shows drafts by making smoke drift. A handheld thermal imaging camera reveals temperature differences at walls, ceilings, and around windows. For a whole-home measurement, a blower door test uses a calibrated fan to create pressure differential and quantify your air leakage rate. Many homeowners start with the smoke pencil and flashlight method, then bring in a professional for thermal imaging or a blower door test.
Can a blower door test help me find air leaks?
A blower door test is one of the most accurate ways to find air leaks. A technician mounts a fan in an exterior doorway and depressurizes your home, which pulls outside air through every gap in the building envelope. Combined with thermal imaging or a smoke pencil, the test pinpoints leaks in attics, knee walls, and around penetrations. It also gives you a measurable air leakage rate so you can track improvements after sealing.
How do I know if my home has air leaks?
You likely have air leaks if you feel drafts near windows, doors, or electrical outlets on windy days. Other clues include high energy bills, rooms that stay too hot or too cold, and visible gaps around pipes or wiring where they enter walls. Cold spots on interior surfaces and condensation on windows also point to air infiltration. A simple DIY test with a smoke pencil or your hand near these areas can confirm whether you need to seal air leaks in house.