
Table of Contents
- Start With an Energy Audit Before You Buy Any DIY Insulation
- How to Seal Air Leaks in Old Houses: A Room-by-Room Checklist
- Attic Insulation R-Value Requirements: What Your Old Attic Actually Needs
- Blown-In Insulation for Existing Walls: What You Can and Cannot Do
- Basements and Crawlspaces: The Moisture Problem Most DIYers Miss
- Insulating Exterior Walls Without Removing Siding
- Common Mistakes That Cause Rot, Mold, and Wasted Money
- Mistake 1: Adding a Vapor Barrier to the Wrong Side of the Wall
- Mistake 2: Sealing a House So Tight That No Fresh Air Moves
- Mistake 3: Insulating Over Wet Wood or Damp Sheathing
- Mistake 4: Skipping Air Sealing and Hoping Insulation Covers It
- Mistake 5: Blocking Soffit Vents With New Insulation
- Mistake 6: Using Fiberglass Against Cold Basement Walls
- Mistake 7: Choosing Materials Without Checking What’s In Them
- Mistake 8: Ignoring the Hazards You Can’t See
- A Simple Safety Checklist for DIY Work in Old Homes
- The Underlying Principle
- Frequently Asked Questions
Last Updated: October 2, 2026
Start With an Energy Audit Before You Buy Any DIY Insulation
An energy audit is the first step before buying any insulation, and it is the foundation of all insulation tips. It shows where your old house loses heat and where your money goes.
Older homes leak in ways you cannot see. A blower door test and a thermal camera find the gaps.
Most guides get this wrong: they start with insulation.
The U.S. Department of Energy guide to home energy audits explains what a proper audit checks. At minimum, you want:
- A blower door test to measure total air leakage
- Infrared scans of walls, ceilings, and floors
- A look at attic ventilation and existing insulation depth
Write down every problem the audit finds. That list becomes your work order.
Ask the auditor to mark the biggest leaks with tape or chalk while they are on site. It saves hours of guessing later.
How to Seal Air Leaks in Old Houses: A Room-by-Room Checklist
Air sealing is the highest-value work in an old house. It stops heat loss and draft reduction before insulation ever goes in. Start in the attic, where the stack effect pulls air upward all winter, then work down.
Attic and top floor:
- Seal wire and pipe penetrations through the ceiling
- Caulk the top plates where walls meet the attic floor
- Weatherstrip the attic hatch or pull-down stairs
- Seal around chimney and flue chases with fire-rated materials
Living areas:
- Caulk baseboards on exterior walls
- Weatherstrip exterior doors, including the bottom sweep
- Seal window frames with caulk, not just the sash
- Close gaps around electrical outlets on outside walls with foam gaskets
Basement and crawlspace:
- Seal the rim joist with rigid foam board and caulk
- Caulk sill plates
- Seal around pipes, ducts, and wiring entering from outside
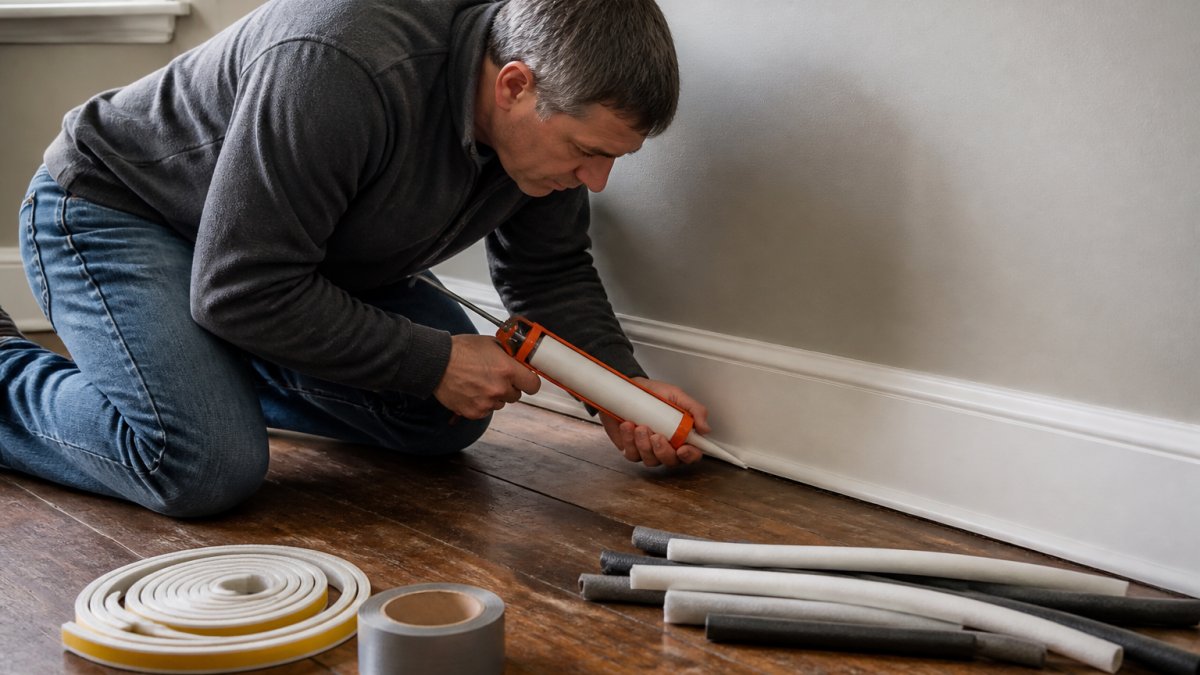
Tools and Materials for Air Sealing
You do not need much to start. A basic kit covers most jobs:
- Caulk gun with paintable latex and silicone caulk
- Closed-cell foam sealant for big gaps
- Weatherstripping for doors and windows
- Foam gaskets for outlets and switches
- Rigid foam board and foil tape for rim joists
The DOE air sealing guide lists which sealant works for each gap size. Foam for gaps over a quarter inch, caulk for hairline cracks.
Attic Insulation R-Value Requirements: What Your Old Attic Actually Needs
Attic R-value requirements depend on your climate zone. In this region, most attics need R-49 to R-60, while older attics often sit at R-11 or less. R-value measures how well insulation resists heat transfer, the higher the number, the slower heat moves through it.
| Climate Zone | Recommended Attic R-Value | Typical Existing Old Attic |
|---|---|---|
| Zone 3 (mid-Atlantic) | R-49 to R-60 | R-11 to R-19 |
| Zone 4 (colder inland) | R-49 to R-60 | R-11 to R-19 |
| Zone 5 (northern edge) | R-49 to R-60 | R-11 to R-19 |
Check the current numbers for your zone through the DOE recommended R-value map before you buy anything.
Air Sealing Before You Add Attic Insulation
Seal first, insulate second. Always. Insulation traps air, so if warm, moist indoor air still leaks into the attic, that moisture gets stuck in the new insulation, causing condensation, damp sheathing, and eventually rot. Blowing insulation straight over open gaps looks finished but performs worse than what was there before.
Ventilation and Baffles: Protecting Your Roof Deck
Attic ventilation keeps the roof deck dry and needs a clear path from soffit vents at the eaves to vents near the ridge. Before adding insulation, install baffles at every rafter bay so insulation cannot block the soffit vents and trap moisture in the worst possible place.
Burying soffit vents with insulation is one of the fastest ways to rot a roof deck. The repair bill dwarfs anything you saved on the insulation job.
Blown-In Insulation for Existing Walls: What You Can and Cannot Do
Blown-in insulation for existing walls works by drilling small holes and filling the interior wall cavity, the only practical way to insulate finished walls without tearing them open. In an older home, the harder question is whether your house’s construction, wiring, and historic status will let you.
Historic District Rules Change the Whole Job
A few practical consequences:
- Interior-only access is often the only approved path. Drilling from inside avoids exterior patching that a commission may reject.
- Original plaster and trim must be preserved. Cutting into historic plaster and re-plastering to match is slower and costlier than drywall patching, and a poor match can trigger a compliance problem later.
- Some assemblies are effectively off-limits. Balloon-frame walls with original lath and plaster, or walls with decorative interior finishes, may be denied outright.
Before you buy a single bag of cellulose, call your local preservation office or building department and ask: (1) Does my property fall under a historic overlay or design review? (2) Is a permit required for wall-cavity insulation? The answer determines your entire approach.
What Makes a Wall a Good Candidate
You can do this on walls with true empty cavities, but not on walls that are already full, wet, or covered in knob-and-tube wiring.
Good candidates:
- Balloon-frame walls with open stud bays
- Walls with no existing insulation
- Homes where exterior siding stays put
- Walls where interior access is acceptable to the homeowner and any review board
Poor candidates:
- Walls with wet or damaged sheathing
- Cavities packed with old, degraded material
- Walls where every bay is blocked by fire blocking
- Walls containing active knob-and-tube wiring (see the safety section below) Addressing these structural vulnerabilities is essential because a well-sealed envelope remains the most effective strategy for preventing ice dams that threaten the integrity of your roofline.
Materials for Existing Wall Cavities
Three materials dominate this work:
- Cellulose insulation: recycled paper, dense-packed, good at blocking airflow
- Fiberglass: light and cheap, but loses performance if air moves through it
- Polyurethane foam: highest performance, but slow and costly for full walls
Insulation density matters more than material choice here. Dense-packed cellulose settles less and blocks air better than loose fill. The EPA guidance on insulation materials covers the safety side of each option.
A Safety Check Before You Drill Anything
Older wall cavities are where the two most common household hazards hide. Before you cut or drill:
- Assume lead paint is present in any home built before 1978. Disturbing painted surfaces can create lead dust. The EPA’s Renovation, Repair, and Painting (RRP) rule requires certified contractors and specific work practices for paid renovation work in pre-1978 housing, and even a DIYer should follow the same containment and cleanup steps.
- Assume asbestos may be present in pre-1980 homes, especially in pipe and duct insulation, some textured ceilings, and certain siding and floor materials. Do not drill, cut, or disturb suspect material. Have it sampled by a licensed inspector first.
- Knob-and-tube wiring must be de-energized or removed before you pack insulation around it. Burying live knob-and-tube in cellulose or foam is a fire risk and a code violation.
If you find suspect asbestos or lead during the job, stop. Contain the area, do not vacuum with a standard shop vac, and call a licensed abatement professional. The cost of testing is trivial compared to the cost of a contaminated home.
Getting the Density Right
Dense-packed cellulose is typically installed at roughly 3.5 pounds per cubic foot in a 2×4 wall, which gives it its air-blocking performance. Loose-blown material at lower density settles and leaves gaps at the top of the cavity. If you hire the work out, ask how the installer verifies density, a good answer involves a scale and a known-volume bag count, not a visual guess.
When to Walk Away
Some walls are not worth insulating. If the audit shows wet sheathing, active leaks, or a cavity that cannot be dried, adding insulation traps moisture and accelerates rot. Fix the water problem first, repointing masonry, restoring foundation drainage, or correcting grading all come before any insulation decision.
Basements and Crawlspaces: The Moisture Problem Most DIYers Miss
Basements and crawlspaces fail for one reason: water. Insulate a wet crawlspace and you grow mold. Crawlspace encapsulation, sealing the floor and walls with a heavy vapor barrier, sealing vents, and controlling humidity, is the fix, and only then does insulation make sense. In basements, fix bulk water first (gutters, grading, downspout extensions), then insulate the walls with rigid foam board sealed at the edges. Watch the dew point: warm humid air meeting a cold surface creates condensation fast, which is why foam, not fiberglass, belongs against basement walls.
In basements and crawlspaces, moisture control comes first. Insulation is the reward for getting it right, not the shortcut around it.
Insulating Exterior Walls Without Removing Siding
You can insulate exterior walls without pulling the siding.
Blowing from inside means drilling into each stud bay and patching afterward, messy but effective, and it keeps your exterior untouched.
Adding rigid foam under new siding works when you are already re-siding.
Common Mistakes That Cause Rot, Mold, and Wasted Money
The worst insulation mistakes all share one trait: they ignore moisture. Here are the ones we see most.
Mistake 1: Adding a Vapor Barrier to the Wrong Side of the Wall
In a cold climate, the vapor retarder belongs on the warm-in-winter side of the assembly; in a hot, humid climate, that logic flips.
What to do instead: In mixed and humid climates, favor vapor-permeable or vapor-variable materials, unfaced mineral wool, cellulose, or a smart vapor retarder, and let the assembly dry.
Mistake 2: Sealing a House So Tight That No Fresh Air Moves
Older homes rely on incidental air leakage for ventilation. Seal every gap and you can create backdrafting on combustion appliances, elevated indoor humidity, and stale air. If you tighten a house significantly, plan for mechanical ventilation, a continuously rated bath fan, kitchen exhaust, or a balanced system.
Mistake 3: Insulating Over Wet Wood or Damp Sheathing
Insulation does not dry wood. It slows drying. If the audit or a moisture meter shows elevated readings, stop and fix the source: roof leaks, flashing, grading, gutters, or plumbing. Only then insulate.
Mistake 4: Skipping Air Sealing and Hoping Insulation Covers It
Insulation slows conductive heat flow. It does not stop air movement. A well-insulated but leaky attic still loses heat through the stack effect. Seal first, insulate second, every time.
Mistake 5: Blocking Soffit Vents With New Insulation
Burying soffit vents traps moisture against the roof deck. Install baffles at every rafter bay before you add insulation. The repair bill for a rotted roof deck dwarfs anything you saved on the insulation job.
Mistake 6: Using Fiberglass Against Cold Basement Walls
Fiberglass against a cold surface in a humid climate invites condensation inside the wall; foam handles it. In a basement or crawlspace, rigid foam board sealed at the edges is the safer choice.
Mistake 7: Choosing Materials Without Checking What’s In Them
Older-home owners often care about indoor air quality, and material choice matters:
- Spray polyurethane foam off-gasses during and shortly after installation. Most manufacturers recommend leaving the space unoccupied for a period, and some sensitive individuals react to the amines used as catalysts. Ask for the safety data sheet before you commit.
- Fiberglass irritates skin, eyes, and lungs during installation. Wear gloves, long sleeves, eye protection, and a NIOSH-rated N95 or P100 respirator.
- Mineral wool and cellulose are generally considered lower-toxicity options. Cellulose is treated with fire retardants, most commonly borate-based, widely regarded as low-hazard, but check the specific product.
- Sheep’s wool and other natural-fiber batts suit homeowners prioritizing non-toxic materials, though they cost more and are less widely stocked.
Mistake 8: Ignoring the Hazards You Can’t See
Before any insulation work in a pre-1978 home, assume lead paint is present. Before work in a pre-1980 home, assume asbestos may be present in pipe wrap, duct insulation, textured ceilings, or certain floor and siding materials. Neither hazard announces itself.
A Simple Safety Checklist for DIY Work in Old Homes
- Respirator: NIOSH-rated N95 minimum; P100 for suspected asbestos or heavy dust
- Eye protection: sealed goggles, not just safety glasses
- Gloves and clothing: long sleeves, gloves, and a change of clothes you can wash separately
- Containment: plastic sheeting and zip walls to keep dust out of living space
- Hepa vacuum: for cleanup, never a standard shop vac on lead or asbestos dust
- De-energize: shut off circuits before working near wiring, especially knob-and-tube
- Ventilation: keep the work area ventilated, and vacate during and after spray foam application
- Stop-work rule: if you find suspect asbestos, lead, or active moisture, stop and call a professional
The Underlying Principle
Old houses were built to dry in both directions. Seal them wrong and you change how the whole building envelope breathes.
If your audit turns up HVAC problems along with insulation gaps, that is where Anthony & Son Indoor Air Quality, LLC comes in.
Frequently Asked Questions
What is the best insulation for an old house with no wall insulation?
For older homes with empty wall cavities, blown-in cellulose or fiberglass is often the most practical choice because it can be installed through small holes without removing drywall. In attics, loose-fill cellulose or fiberglass works well over existing materials. If you have knob-and-tube wiring or active moisture problems, fix those first. In Maryland, DC, and Northern Virginia, a licensed contractor can confirm which insulation tips fit your home’s structure and local code requirements.
Can I add insulation to an old house without removing drywall?
Yes. Blown-in insulation for existing walls is designed for exactly this situation. Installers drill small holes between studs, blow in cellulose or fiberglass, then patch and paint. The process usually takes a day or two for an average home. You can also add rigid foam board to basements or crawlspaces without touching interior drywall. Always check for moisture issues first, because trapping damp air inside a wall cavity leads to rot and mold.
Is it worth insulating an old house?
It depends on your starting point. If your home has little or no insulation, adding it can noticeably reduce heat loss and draftiness. The biggest gains usually come from air sealing first, then attic insulation, then walls. Older homes often have thermal bridging through studs and unsealed top plates, so a whole-house approach works better than one isolated upgrade. An energy audit will show where your home loses the most heat and help you prioritize.
How do I find air leaks in an older home?
On a windy day, hold a lit incense stick or a thin piece of tissue near common leak points: baseboards, window frames, door frames, electrical outlets, attic hatches, and where pipes or wires enter walls. Watch for the smoke or tissue to flutter. You can also use a flashlight at night to spot gaps around doors and windows. Once you find leaks, seal them with caulk, weatherstripping, or spray foam before adding new insulation.
Older homes rarely fail on insulation alone. The real problems are airflow, moisture, and a system that was never sized for how the house actually works. Anthony & Son Indoor Air Quality, LLC can help you sort out which fixes matter first. Our certified technicians offer HVAC repair, preventative maintenance, and indoor air quality solutions that keep old houses comfortable and efficient all year. Contact us today to schedule a visit.